Write shaders.See them live.Wear them.
A full GLSL editor for Android with instant preview, syntax highlighting, 40+ built-in uniforms for sensors, camera, touch and more — plus live wallpaper support. Free & open source.
Everything you need to create
A complete GLSL development environment in your pocket — write, preview, and ship shaders without leaving your phone.
Live Preview
Your shader renders behind the code as you type — zero compile buttons.
Choose how shaders update: instantly as you type, on manual tap, or in a separate preview window. An FPS counter in the toolbar helps you optimize. Adjustable render quality lets you balance detail against performance on any device.
Syntax & Error Highlighting
Full GLSL syntax highlighting with rich token coloring.
Keywords, types, built-in functions, qualifiers, and more — each highlighted distinctly. Compile errors are underlined inline and tapping the error bar opens a jump-to-line list for quick fixing.
Live Wallpaper
Set any shader as your Android live wallpaper with one tap.
Battery-aware rendering automatically pauses when power is low. Your wallpaper responds to home screen paging via the offset uniform, and you can keep editing while your wallpaper runs.
Camera as Texture
Front and back camera feeds as live shader textures.
Automatic orientation correction for portrait and landscape. Use the camera feed as input for edge detection, color grading, distortion, or AR-style effects — all in real time.
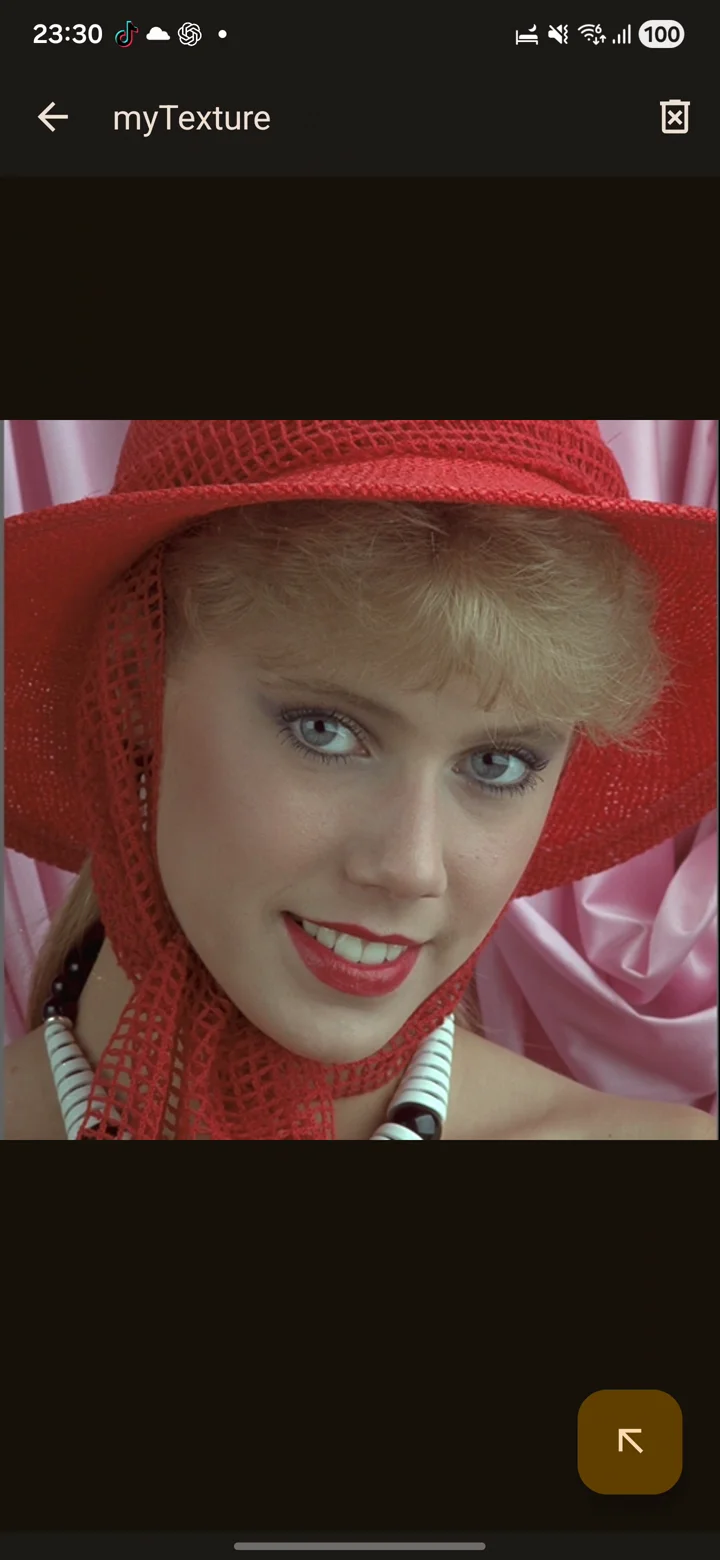
Textures & Cube Maps
Import any image as a 2D texture or compose a cube map from 6 faces.
Full sampler control — wrap mode, min/mag filter, and mipmap settings. Imported textures are stored with your shaders so they travel with database exports.
Editor Power Features
Undo/redo, completions, bracket pairing, and ShaderToy import.
Completions appear above the keyboard as you type. Auto-indenting and bracket pairing keep your code tidy. Paste ShaderToy code and it auto-converts to ShaderEditor uniforms. Several coding fonts with ligature support are included.
Multi-Touch & Interaction
Up to 10 simultaneous touch points as vec3 uniforms.
Each pointer provides (x, y, size). Plus touch, touchStart, mouse uniforms. Use for painting, sculpting, or interactive art.
Audio Reactive
Microphone amplitude and media volume drive your visuals.
Read microphone input as a 0–1 amplitude value, or tap into the current media volume each frame. Build music visualizers, audio-reactive art, or live VJ tools.
See it in action
Tap any card to view the full screenshot or video. Use the arrows or swipe to browse.
Learn by example
Paste any example straight into ShaderEditor. Each one walks you through the GLSL techniques it uses.
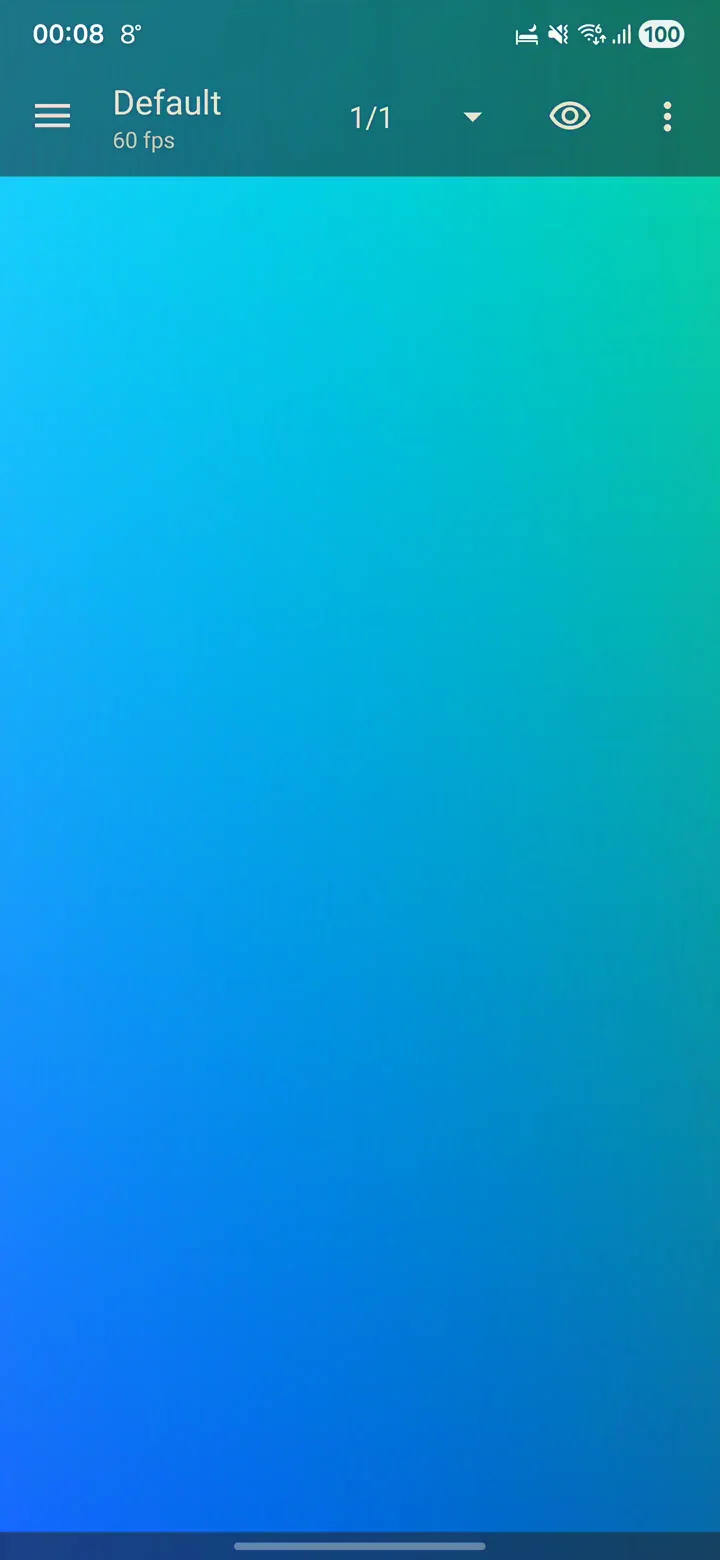
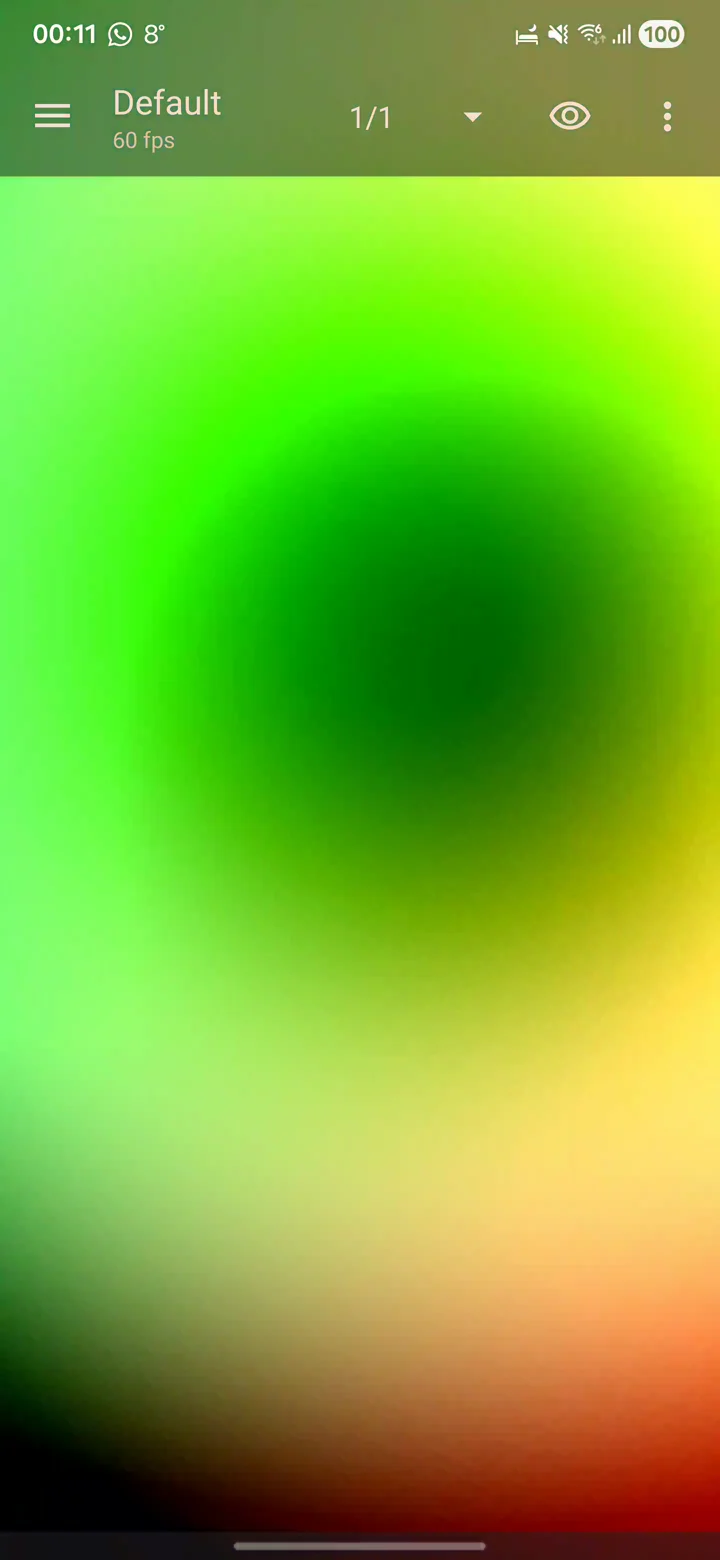
Every fragment shader runs once per pixel, every frame. gl_FragCoord.xy gives the pixel’s position, and dividing by resolution normalizes it to 0–1 — this is called UV coordinates.
The color formula 0.5 + 0.5 * cos(time + uv.xyx + vec3(0, 2, 4)) is a classic trick by Inigo Quilez: it produces smooth, cycling rainbow hues by phase-shifting cosine waves across the RGB channels. The vec3(0, 2, 4) offsets red, green, and blue so they peak at different UV positions.
Uniforms used: time (float, seconds since shader started) and resolution (vec2, viewport size in pixels). These are the two most fundamental ShaderEditor uniforms — almost every shader needs them.
Try this: Change vec3(0, 2, 4) to vec3(0, 0.5, 1) for a warmer palette, or multiply uv.xyx by 3.0 for more color bands.
#ifdef GL_FRAGMENT_PRECISION_HIGH
precision highp float;
#else
precision mediump float;
#endif

uniform float time;
uniform vec2 resolution;

void main(void) {
	vec2 uv = gl_FragCoord.xy / resolution;
	vec3 col = 0.5 + 0.5 * cos(time + uv.xyx + vec3(0, 2, 4));
	gl_FragColor = vec4(col, 1.0);
}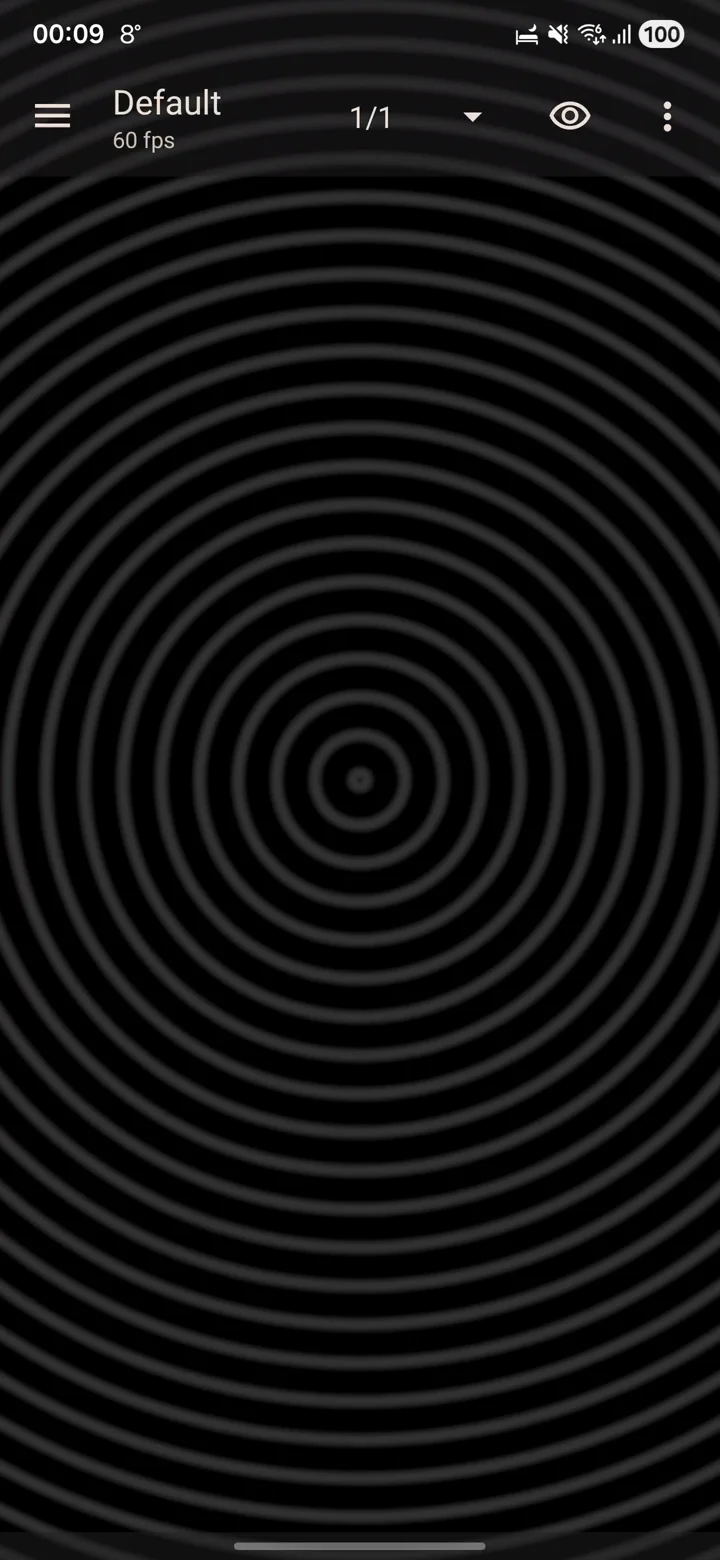
This shader computes the distance() from every pixel to the center of the screen, then feeds it into sin() to create concentric rings. Multiplying the distance by 255.0 packs many rings tightly together.
Aspect-ratio handling: Instead of dividing by resolution directly (which would stretch the circles on non-square screens), both the UV and the center are divided by max(resolution.x, resolution.y). This keeps circles perfectly round regardless of screen shape.
Uniforms used: resolution (vec2) and time (float). Time is multiplied by 10 to animate the rings outward.
Try this: Replace sin(...) * 0.2 with step(0.0, sin(...)) for sharp black-and-white rings. Add color by using separate frequencies per channel: vec3(sin(t - d*200.), sin(t - d*255.), sin(t - d*300.)).
#ifdef GL_FRAGMENT_PRECISION_HIGH
precision highp float;
#else
precision mediump float;
#endif

uniform vec2 resolution;
uniform float time;

void main(void) {
	float mx = max(resolution.x, resolution.y);
	vec2 uv = gl_FragCoord.xy / mx;
	vec2 center = resolution / mx * 0.5;
	float t = time * 10.0;

	gl_FragColor = vec4(
		vec3(sin(t - distance(uv, center) * 255.0)) * 0.2,
		1.0);
}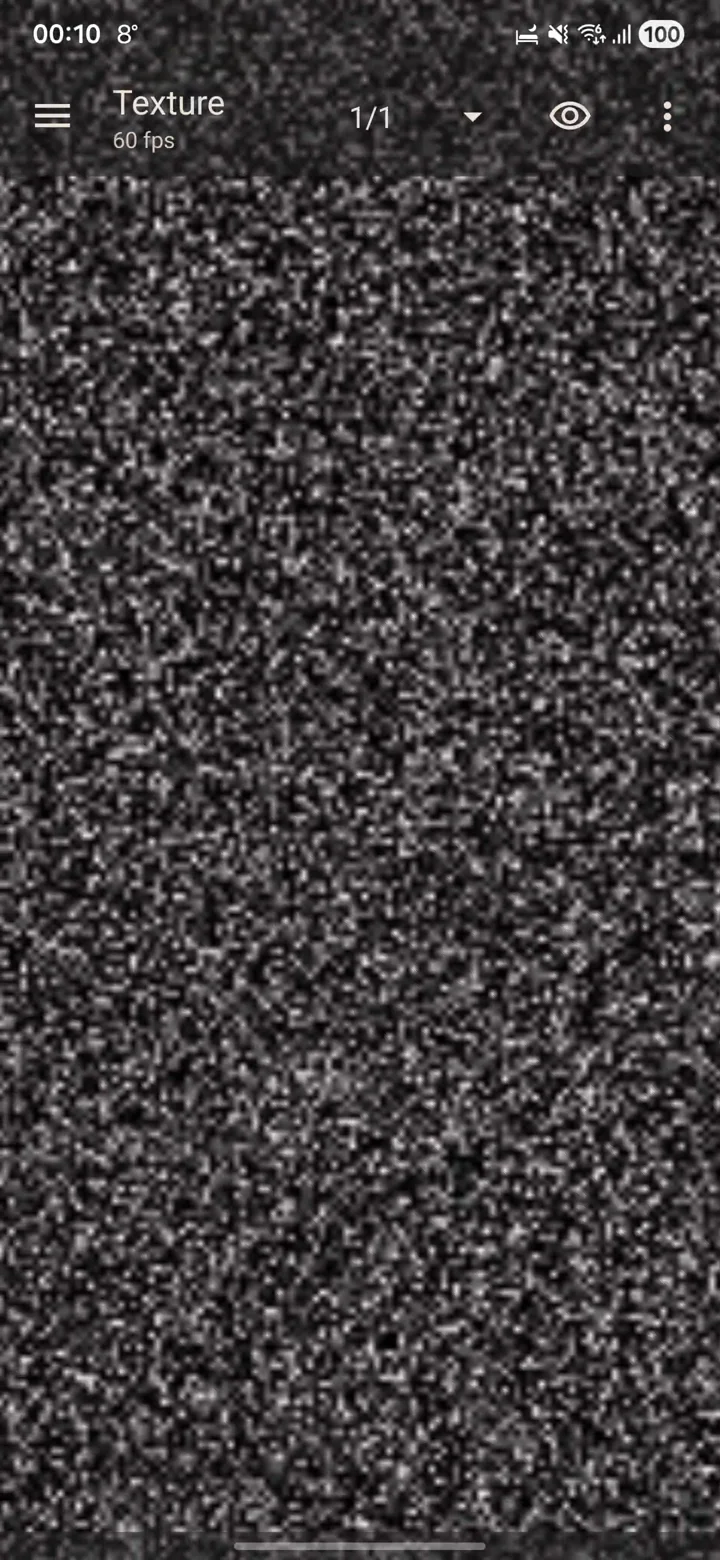
ShaderEditor lets you import images as sampler2D uniforms. To add a texture, tap the menu → “Add uniform” → choose a 2D texture or pick one of the built-in presets like noise.
The shader reads pixel colors from the texture with texture2D(sampler, uv). Adding sin(time) to the UV coordinates shifts the sampling position over time, creating a panning animation through the texture.
Aspect-ratio note: Dividing by max(resolution.x, resolution.y) instead of resolution keeps the texture’s aspect ratio — dividing by resolution directly would stretch it to fill the screen.
Try this: Distort the texture: replace uv + sin(time) with uv + 0.05 * vec2(sin(time + uv.y * 10.0), cos(time + uv.x * 10.0)) for a wavy water effect.
#ifdef GL_FRAGMENT_PRECISION_HIGH
precision highp float;
#else
precision mediump float;
#endif

uniform float time;
uniform vec2 resolution;
uniform sampler2D noise;

void main(void) {
	vec2 uv = gl_FragCoord.xy / max(resolution.x, resolution.y);

	gl_FragColor = vec4(
		texture2D(noise, uv + sin(time)).rgb,
		1.0);
}
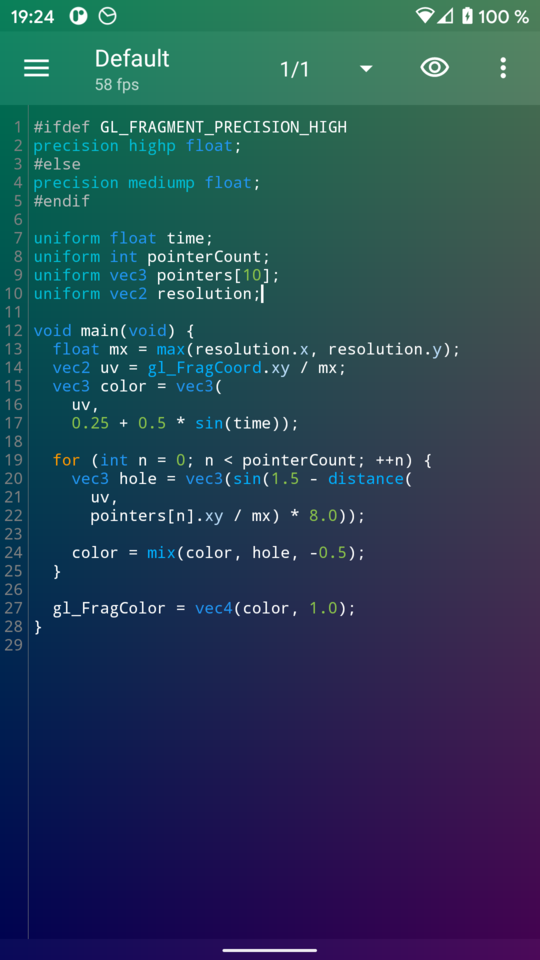
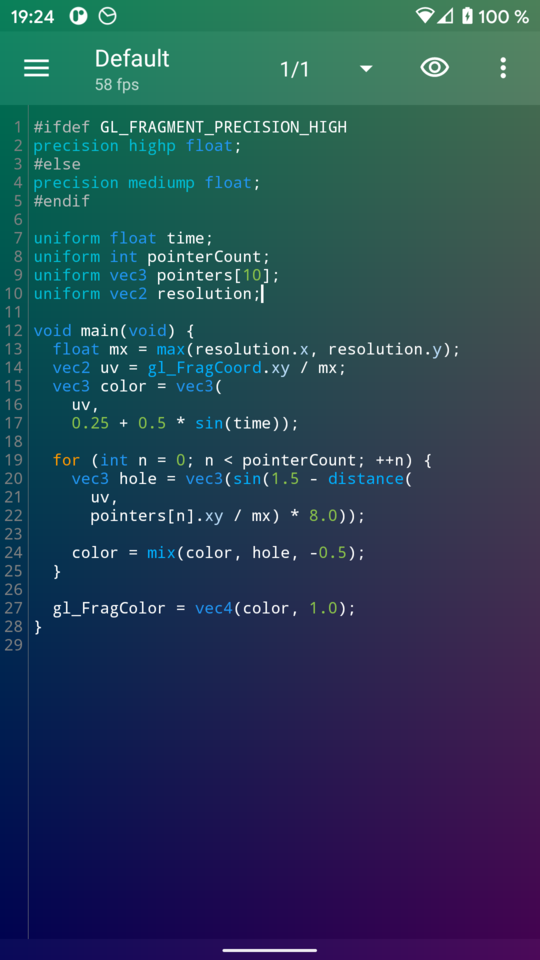
ShaderEditor provides up to 10 simultaneous touch points through the pointers[10] array (each a vec3 with x, y in pixels, z = pressure) and pointerCount (how many are active).
The background is a smooth UV gradient animated by time. For each active pointer, the shader computes the distance() from the current pixel to the touch position, wraps it through sin() to create rings, then blends it into the background using mix() with a negative factor (-0.5). Negative mix factors extrapolate rather than interpolate, creating the characteristic dark ripple inversion.
Uniforms used: pointerCount (int), pointers[10] (vec3 array), time, resolution.
Try this: Change 8.0 to 30.0 for tighter rings. Change -0.5 to 0.5 for a bright glow instead of dark ripples. Add + time * 5.0 inside the sin() to animate the rings outward from each finger.
#ifdef GL_FRAGMENT_PRECISION_HIGH
precision highp float;
#else
precision mediump float;
#endif

uniform float time;
uniform int pointerCount;
uniform vec3 pointers[10];
uniform vec2 resolution;

void main(void) {
	float mx = max(resolution.x, resolution.y);
	vec2 uv = gl_FragCoord.xy / mx;
	vec3 color = vec3(uv, 0.25 + 0.5 * sin(time));

	for (int n = 0; n < pointerCount; ++n) {
		vec3 hole = vec3(sin(1.5 - distance(
			uv, pointers[n].xy / mx) * 8.0));
		color = mix(color, hole, -0.5);
	}
	gl_FragColor = vec4(color, 1.0);
}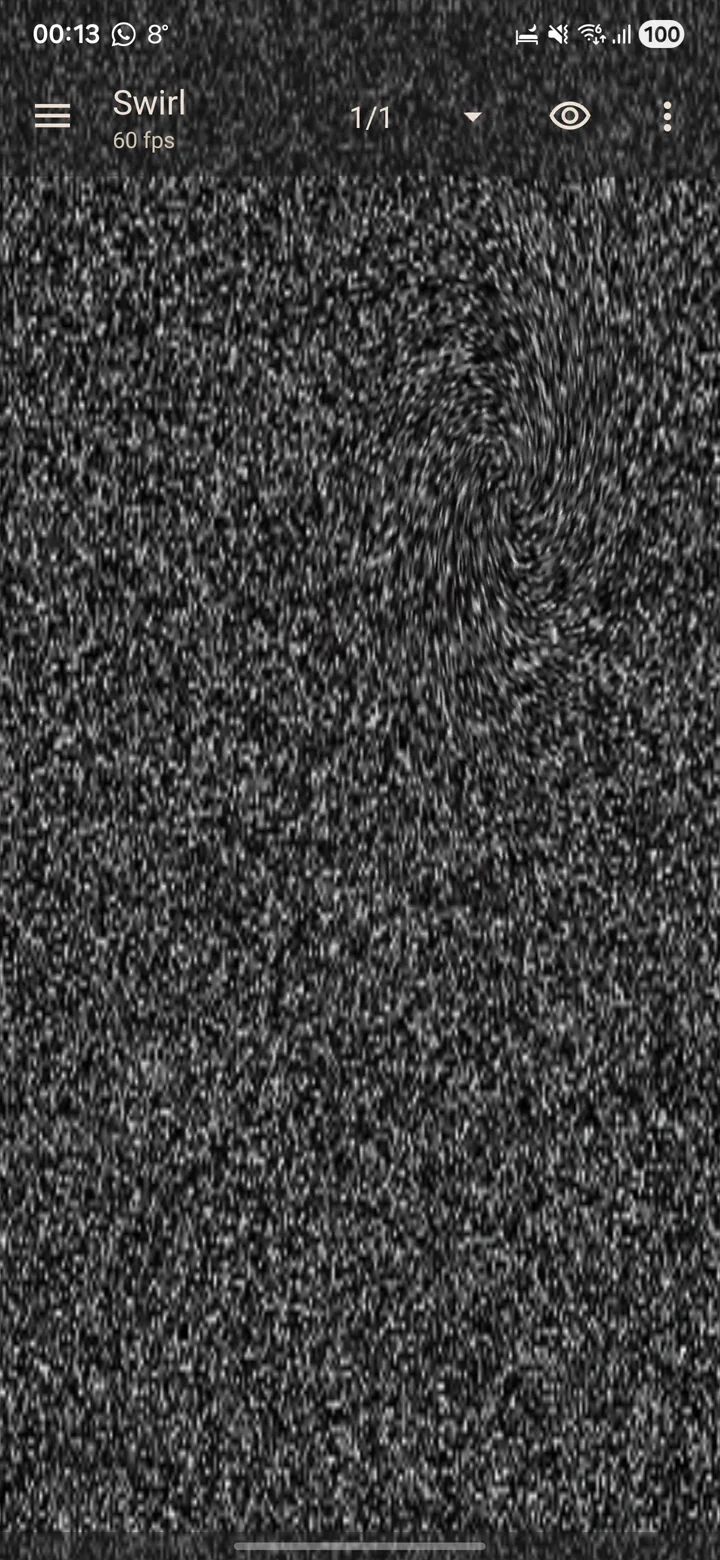
This shader applies a rotation matrix to UV coordinates based on distance from each touch point. Near a finger, the rotation angle is large (creating a swirl); far away, exp(20.0 * length(st)) makes the denominator huge, so the angle drops to zero — no distortion.
The mat2(c, s, -s, c) is a 2D rotation matrix. Subtracting 1 from cosine (cos(angle) - 1.0) makes the distortion additive — the identity matrix gives zero displacement. Each touch point contributes its own swirl and they accumulate.
How to use: This shader requires a texture uniform. Tap menu → “Add uniform” → pick any 2D texture or use the noise preset. Then touch the screen to create swirls.
Try this: Change 20. to 5. for wider, softer swirls. Remove sin(time * 10.) to make the swirl direction constant instead of oscillating.
#ifdef GL_FRAGMENT_PRECISION_HIGH
precision highp float;
#else
precision mediump float;
#endif

uniform float time;
uniform vec2 resolution;
uniform vec3 pointers[10];
uniform sampler2D noise;
uniform int pointerCount;

void main(void) {
	vec2 uv = gl_FragCoord.xy / resolution.xy;
	vec2 distortion;

	for (int i = 0; i < pointerCount; i++) {
		vec2 pc = pointers[i].xy / resolution.xy;
		vec2 st = uv - pc;
		float angle = 6.2831 /
			(exp(20. * length(st)) + 1.) *
			sin(time * 10.);
		float s = sin(angle);
		float c = cos(angle) - 1.;
		distortion += mat2(c, s, -s, c) * st;
	}

	gl_FragColor = vec4(
		texture2D(noise, uv + distortion).rgb,
		1.0
	);
}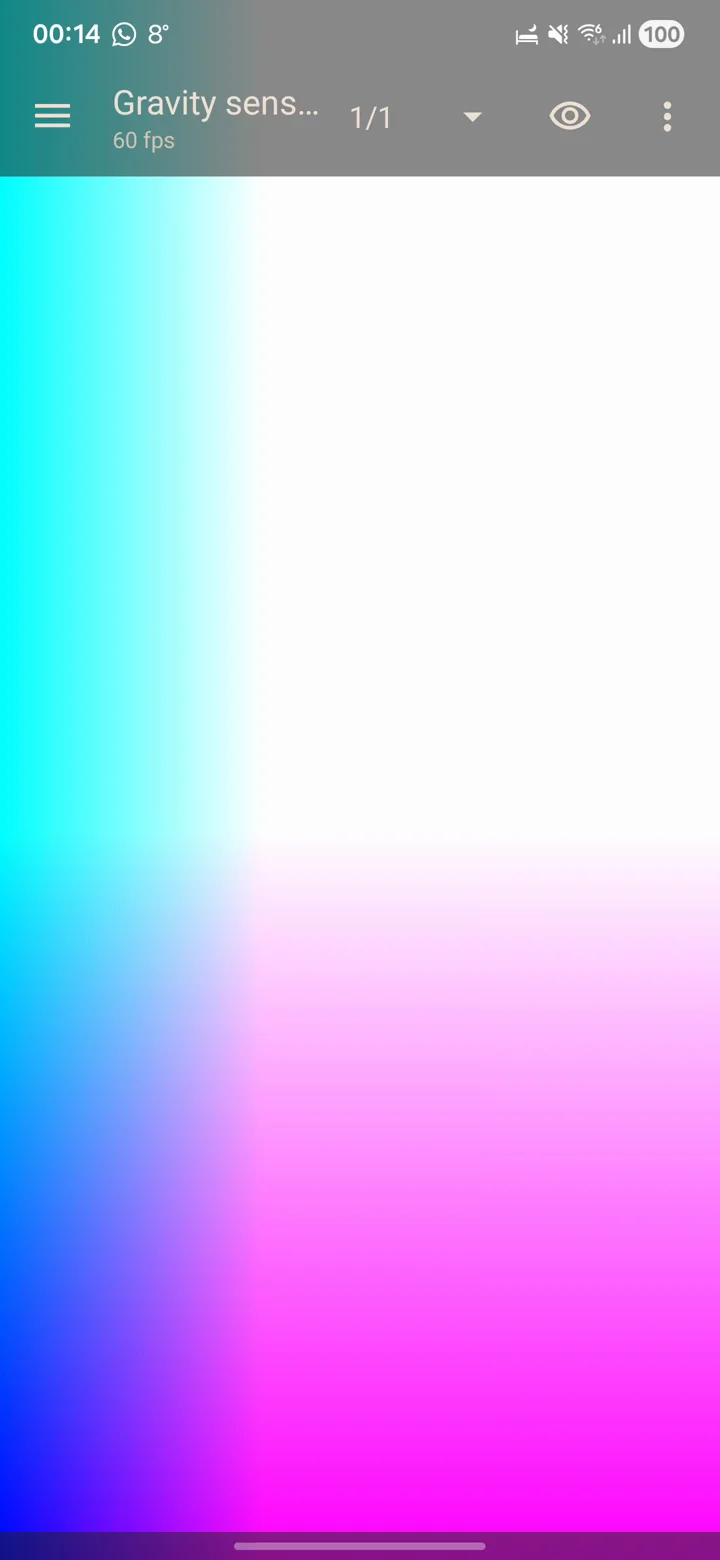
The gravity uniform is a vec3 reporting the device’s gravity vector in m/s². When the phone is flat on a table, gravity ≈ (0, 0, 9.81). Tilting shifts values into the x and y components.
The expression 9.80665 / abs(gravity - 4.90332) creates a non-linear color response: when a gravity component is near 4.9 (half of Earth gravity), the division approaches infinity and the color channel saturates. This produces vivid color pops as you tilt through specific angles.
Uniforms used: gravity (vec3, m/s²) and resolution (vec2). The gravity sensor must be present on the device — most Android phones have one.
Try this: For a smoother response, replace the formula with vec3(uv, 1.0) * gravity * 0.1. To make a tilt-controlled spotlight, compute vec2 tilt = gravity.xy / 9.81 and use it as a center point for a radial gradient.
#ifdef GL_FRAGMENT_PRECISION_HIGH
precision highp float;
#else
precision mediump float;
#endif

uniform vec2 resolution;
uniform vec3 gravity;

void main(void) {
	vec2 uv = gl_FragCoord.xy / resolution.xy;

	gl_FragColor = vec4(
		vec3(uv, 1.0) * 9.80665 / abs(gravity - 4.90332),
		1.0);
}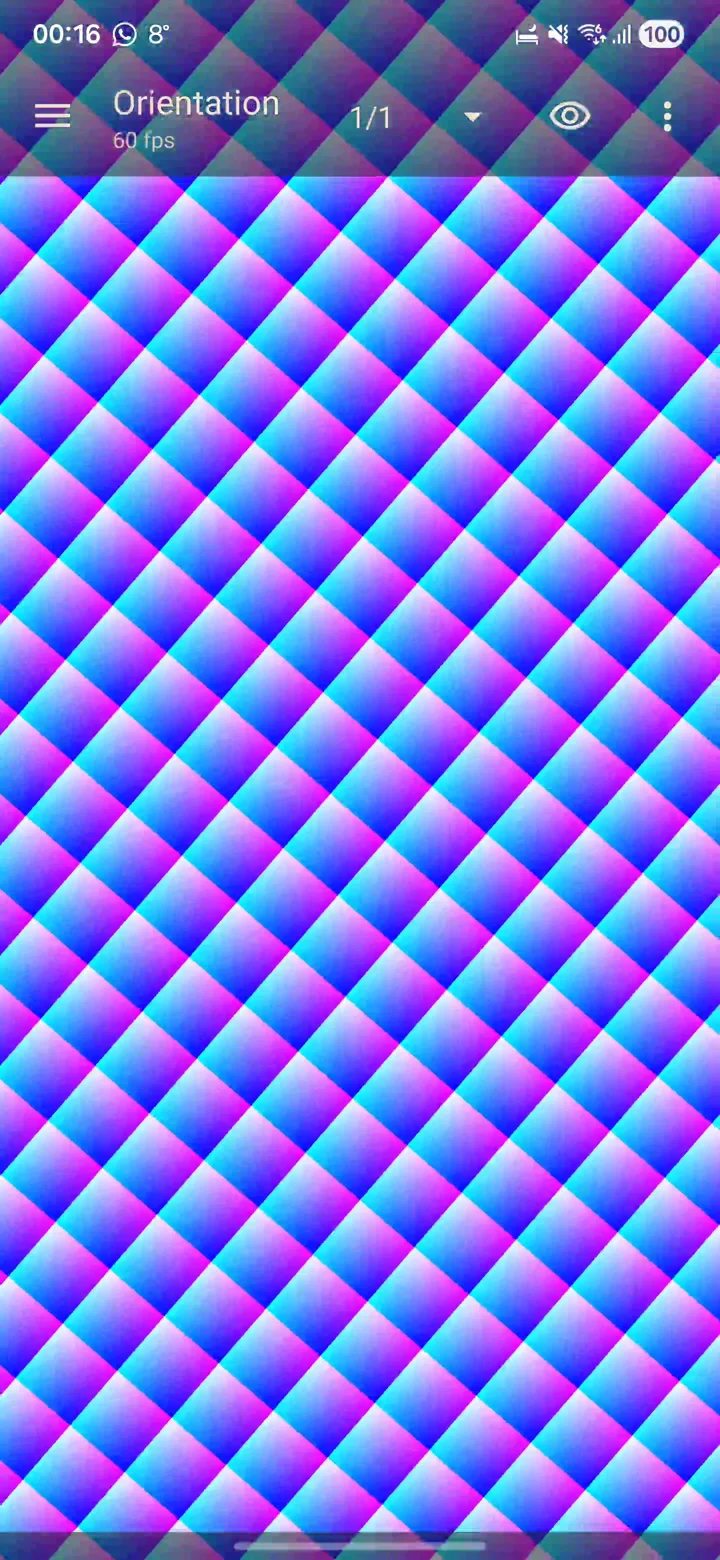
The orientation uniform is a vec3 containing azimuth, pitch, and roll in radians. This shader uses orientation.z (roll) to build a 3×3 rotation matrix that spins the UV coordinate space.
The UVs are first centered (uv * 2.0 - 1.0), then rotated using mat3(cos, sin, 0, -sin, cos, 0, 0, 0, 1) — a standard Z-axis rotation. After rotation, mod(uv, 0.2) * 5.0 tiles the space into a repeating 5×5 grid and maps tile-local coordinates to color. The result is a checkered pattern that tilts with your device.
Uniforms used: orientation (vec3, radians) and resolution. Dividing by min(resolution.x, resolution.y) ensures uniform scaling in both directions.
Try this: Use orientation.x (azimuth) instead of .z to react to compass heading. Change 0.2 to 0.1 for a finer grid. Add a time component: float a = orientation.z + time * 0.5; for auto-spin.
#ifdef GL_FRAGMENT_PRECISION_HIGH
precision highp float;
#else
precision mediump float;
#endif

uniform vec2 resolution;
uniform vec3 orientation;

void main(void) {
	vec2 uv = gl_FragCoord.xy /
		min(resolution.x, resolution.y);

	uv = uv * 2.0 - 1.0;

	vec3 uv3 = vec3(uv, 0.0);
	float a = orientation.z;
	float ac = cos(a);
	float as = sin(a);
	uv3 *= mat3(
		ac, as, 0.0,
		-as, ac, 0.0,
		0.0, 0.0, 1.0);
	uv.x = uv3.x;
	uv.y = uv3.y;

	uv = mod(uv, 0.2) * 5.0;

	gl_FragColor = vec4(uv, 1.0, 1.0);
}
ShaderEditor can stream the device camera directly into your shader as a texture. The back camera appears as cameraBack (front as cameraFront). These use samplerExternalOES instead of sampler2D because Android camera frames are external GL textures.
The catch: the camera’s orientation doesn’t always match the screen. ShaderEditor provides cameraOrientation (a mat2 rotation matrix) and cameraAddent (a vec2 offset) to correct the mapping. The formula cameraAddent + uv * cameraOrientation handles portrait/landscape and front/back differences automatically.
How to use: Add the camera uniform via menu → “Add uniform” → scroll down to “cameraBack” (needs camera permission).
Try this: Convert to grayscale: vec3 c = texture2D(cameraBack, st).rgb; float g = dot(c, vec3(0.299, 0.587, 0.114));. Or edge-detect by sampling neighboring pixels and comparing differences.
#ifdef GL_FRAGMENT_PRECISION_HIGH
precision highp float;
#else
precision mediump float;
#endif

uniform vec2 resolution;
uniform vec2 cameraAddent;
uniform mat2 cameraOrientation;
uniform samplerExternalOES cameraBack;

void main(void) {
	vec2 uv = gl_FragCoord.xy / resolution.xy;
	vec2 st = cameraAddent + uv * cameraOrientation;

	gl_FragColor = vec4(
		texture2D(cameraBack, st).rgb,
		1.0);
}
This shader turns the screen into a live battery indicator. The battery uniform is a float from 0.0 (empty) to 1.0 (full), updated in real time by the system.
step(uv.x, battery) is the key: it returns 1.0 for all pixels whose x-coordinate is less than the battery level, and 0.0 for the rest. This creates a hard-edged bar whose width matches the charge percentage.
mix(vec3(1, 0.2, 0.2), vec3(0.2, 1, 0.3), battery) interpolates the bar’s color from red (low) to green (full) based on the same battery value. The bar gets greener as you charge.
Uniforms used: battery (float, 0–1) and resolution. Also available: powerConnected (bool, true when charging) and nightMode (bool, system dark mode).
Try this: Replace step() with smoothstep(battery - 0.01, battery + 0.01, uv.x) for a soft edge. Add a glow: float glow = 0.005 / abs(uv.x - battery); for a bright line at the battery edge.
#ifdef GL_FRAGMENT_PRECISION_HIGH
precision highp float;
#else
precision mediump float;
#endif

uniform vec2 resolution;
uniform float battery;

void main(void) {
	vec2 uv = gl_FragCoord.xy / resolution;
	vec3 bar = vec3(step(uv.x, battery));
	bar *= mix(vec3(1.0, 0.2, 0.2), vec3(0.2, 1.0, 0.3), battery);
	gl_FragColor = vec4(bar, 1.0);
}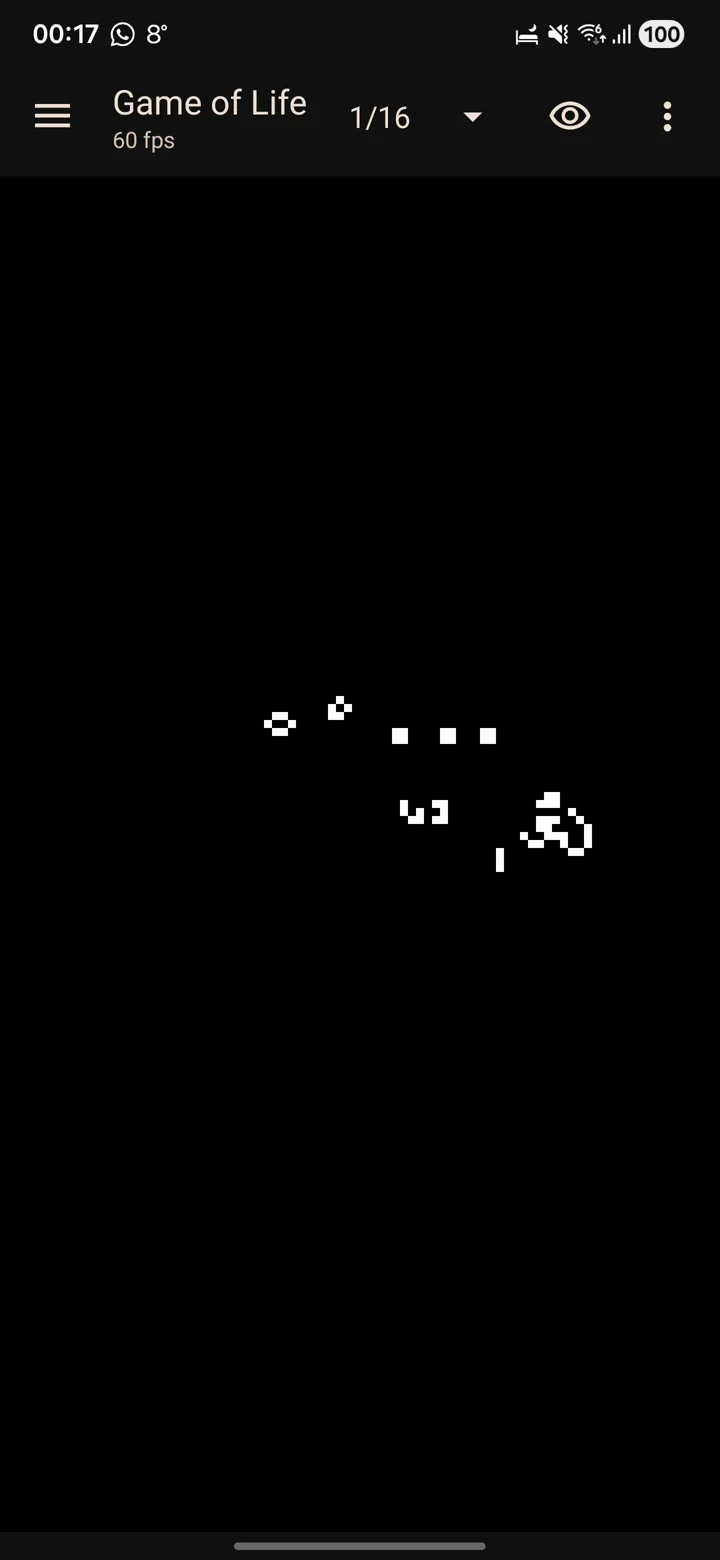
The backbuffer uniform is a sampler2D that contains the previous frame’s output. This lets each frame build on the last — essential for simulations, trails, and feedback effects.
Each pixel samples its 8 neighbors from the backbuffer and sums their red channel values. Conway’s rules are encoded using step(): the oneIfZero() helper returns 1.0 only when the input equals zero (within a 0.1 tolerance). A cell is born if it has exactly 3 neighbors (has3), or survives if it has 2 and was already alive (has2 * get(0,0)).
Touch input acts as a “brush” — when any pointer is within tap distance, the neighbor sum is forced to 3.0, birthing new cells.
Uniforms used: backbuffer (sampler2D), pointerCount, pointers[10], resolution.
Try this: Map alive-time to color by storing age in the green channel. Change the 0.05 multiplier for a bigger or smaller touch brush. Add * 0.99 to the output to make cells fade and create trails.
#ifdef GL_FRAGMENT_PRECISION_HIGH
precision highp float;
#else
precision mediump float;
#endif

uniform vec2 resolution;
uniform int pointerCount;
uniform vec3 pointers[10];
uniform sampler2D backbuffer;

float get(float x, float y) {
	return texture2D(backbuffer,
		(gl_FragCoord.xy + vec2(x, y)) / resolution).r;
}

float oneIfZero(float value) {
	return step(abs(value), 0.1);
}

vec3 evaluate(float sum) {
	float has3 = oneIfZero(sum - 3.0);
	float has2 = oneIfZero(sum - 2.0);
	// alive if 3 neighbors, or 2 + was alive
	return vec3(has3 + has2 * get(0.0, 0.0));
}

void main() {
	float sum =
		get(-1.0, -1.0) + get(-1.0, 0.0) + get(-1.0, 1.0) +
		get( 0.0, -1.0) +                   get( 0.0, 1.0) +
		get( 1.0, -1.0) + get( 1.0, 0.0) + get( 1.0, 1.0);

	float tap = min(resolution.x, resolution.y) * 0.05;
	for (int n = 0; n < pointerCount; ++n) {
		if (distance(pointers[n].xy, gl_FragCoord.xy) < tap) {
			sum = 3.0;
			break;
		}
	}

	gl_FragColor = vec4(evaluate(sum), 1.0);
}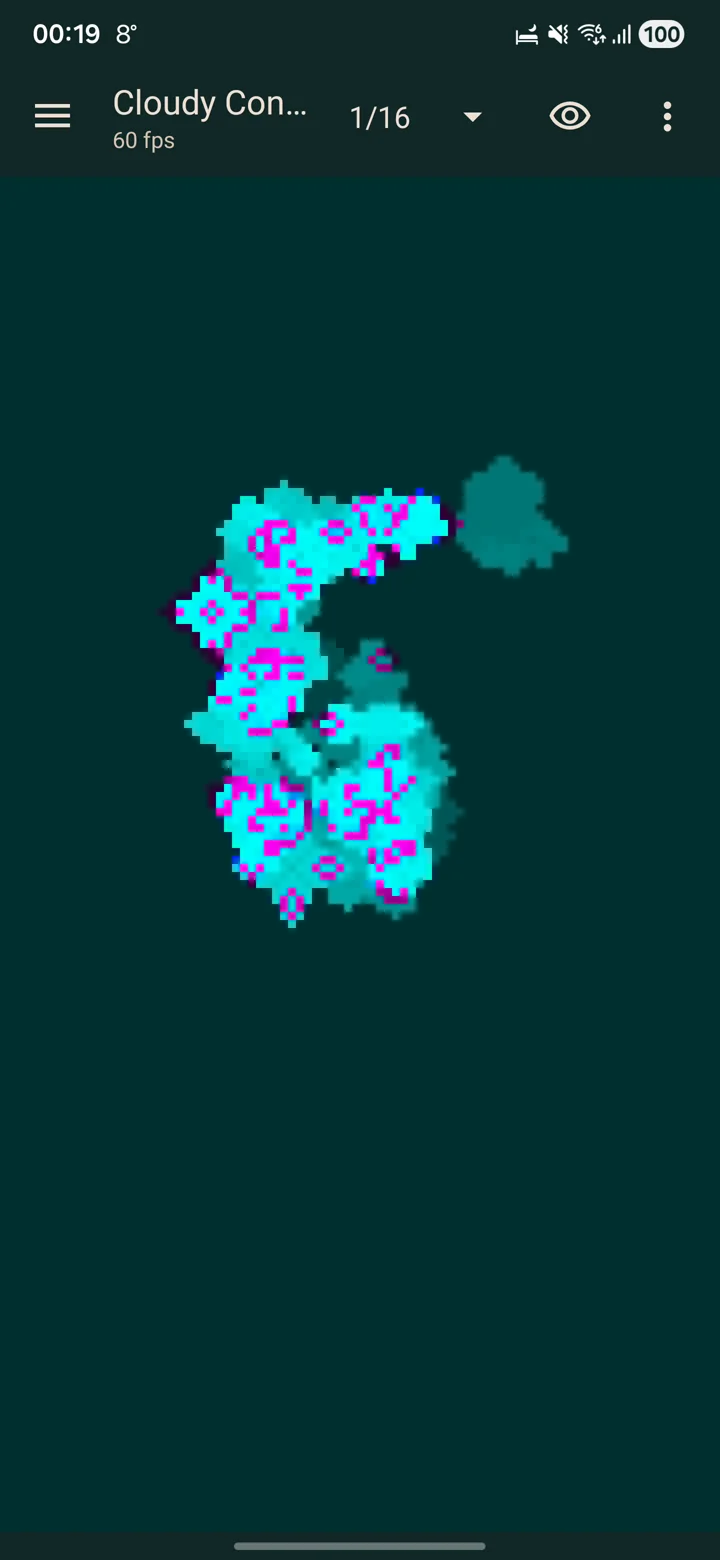
This builds on the Game of Life by using all four RGBA channels to track cell state over time, not just alive/dead. The alpha channel stores whether the cell is alive. The blue channel stores “afterglow” — a value that jumps to 1.0 when a cell dies, then slowly decays (afterglow * 0.99 each frame).
The evaluate() function routes afterglow through red and green based on alive/dead status, creating a two-tone color trail: living cells glow one color, recently-dead cells fade through another. The 0.99 decay factor means trails persist for hundreds of frames.
vec4 channel mapping: R = afterglow × alive (living cell color), G = afterglow × dead (trail color), B = max(decay, justDied) (afterglow tracker), A = alive flag.
Try this: Change 0.99 to 0.95 for faster-fading trails, or 0.999 for very long persistence. Swap the red and green assignments in the return statement to change the color scheme.
#ifdef GL_FRAGMENT_PRECISION_HIGH
precision highp float;
#else
precision mediump float;
#endif

/* Cloudy Conway
 * http://www.vexorian.com/2015/05/cloudy-conway.html
 */

uniform vec2 resolution;
uniform int pointerCount;
uniform vec3 pointers[10];
uniform sampler2D backbuffer;

float oneIfZero(float value) {
	return step(abs(value), 0.1);
}

vec4 get4(float x, float y) {
	return texture2D(backbuffer,
		(gl_FragCoord.xy + vec2(x, y)) / resolution);
}

vec4 evaluate(float sum) {
	vec4 cell = get4(0.0, 0.0);
	float wasAlive = cell[3];
	float has3 = oneIfZero(sum - 3.0);
	float has2 = oneIfZero(sum - 2.0);
	float isAlive = min(1.0, has3 + has2 * wasAlive);
	float justDied = (1.0 - isAlive) * wasAlive;
	float afterglow = cell[2];
	return vec4(
		afterglow * isAlive,
		afterglow * (1.0 - isAlive),
		max(afterglow * 0.99, justDied),
		isAlive);
}

float get(float x, float y) {
	return get4(x, y).a;
}

void main() {
	float sum =
		get(-1.0, -1.0) + get(-1.0, 0.0) + get(-1.0, 1.0) +
		get( 0.0, -1.0) +                   get( 0.0, 1.0) +
		get( 1.0, -1.0) + get( 1.0, 0.0) + get( 1.0, 1.0);

	float tapSize = min(resolution.x, resolution.y) * 0.05;
	for (int n = 0; n < pointerCount; ++n) {
		if (distance(pointers[n].xy, gl_FragCoord.xy) < tapSize) {
			sum = 3.0;
			break;
		}
	}

	gl_FragColor = evaluate(sum);
}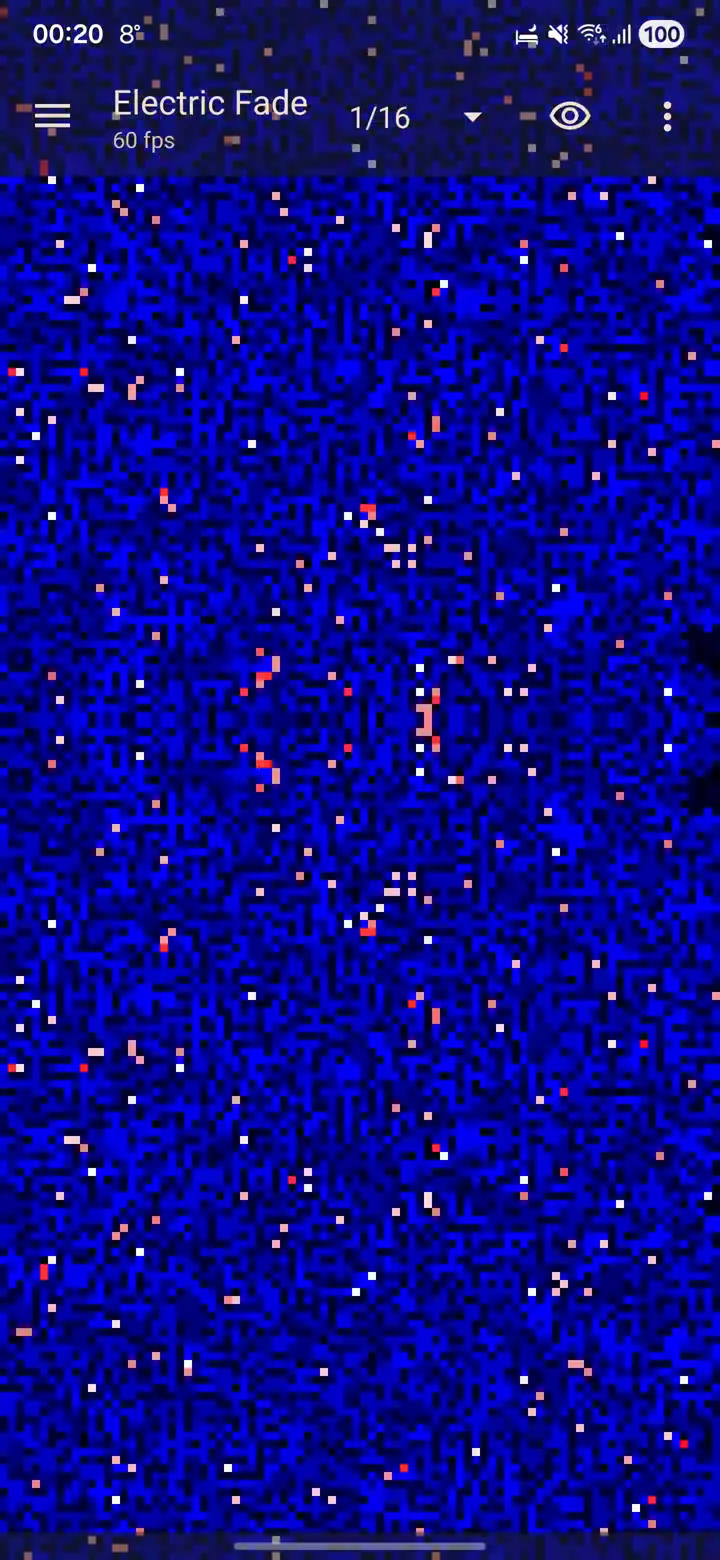
This is a Cloudy Conway variant with one crucial difference: the backbuffer declaration includes ///p:noise — a ShaderEditor directive that pre-fills the backbuffer with a noise texture instead of starting blank.
Because the noise provides random initial alive/dead states, the simulation ignites immediately with complex patterns instead of requiring you to touch-seed cells manually. The color channel mapping is also swapped (alive → red, afterglow routing → green/alpha), producing an electric blue-to-cyan palette.
The ///p: syntax: When you declare uniform sampler2D backbuffer;///p:noise, ShaderEditor initializes the backbuffer’s first frame from the named preset texture. This is a ShaderEditor-specific extension — it won’t work in other GLSL environments.
Try this: Change ///p:noise to just backbuffer; (no preset) and compare — you’ll get a blank start that requires touch seeding. Try other presets by importing your own textures through “Add uniform”.
#ifdef GL_FRAGMENT_PRECISION_HIGH
precision highp float;
#else
precision mediump float;
#endif

/* Based on Cloudy Conway
 * http://www.vexorian.com/2015/05/cloudy-conway.html
 */

uniform vec2 resolution;
uniform int pointerCount;
uniform vec3 pointers[10];
uniform sampler2D backbuffer;///p:noise

float oneIfZero(float value) {
	return step(abs(value), 0.1);
}

vec4 get4(float x, float y) {
	return texture2D(backbuffer,
		(gl_FragCoord.xy + vec2(x, y)) / resolution);
}

vec4 evaluate(float sum) {
	vec4 cell = get4(0.0, 0.0);
	float wasAlive = cell[0];
	float has3 = oneIfZero(sum - 3.0);
	float has2 = oneIfZero(sum - 2.0);
	float isAlive = min(1.0, has3 + has2 * wasAlive);
	float justDied = (1.0 - isAlive) * wasAlive;
	float afterglow = cell[2];
	return vec4(
		isAlive,
		afterglow * isAlive,
		max(afterglow * 0.99, justDied),
		afterglow * (1.0 - isAlive));
}

float get(float x, float y) {
	return get4(x, y).a;
}

void main() {
	float sum =
		get(-1.0, -1.0) + get(-1.0, 0.0) + get(-1.0, 1.0) +
		get( 0.0, -1.0) +                   get( 0.0, 1.0) +
		get( 1.0, -1.0) + get( 1.0, 0.0) + get( 1.0, 1.0);

	float tapSize = min(resolution.x, resolution.y) * 0.05;
	for (int n = 0; n < pointerCount; ++n) {
		if (distance(pointers[n].xy, gl_FragCoord.xy) < tapSize) {
			sum = 3.0;
			break;
		}
	}

	gl_FragColor = evaluate(sum);
}
GLES 3.0 (OpenGL ES 3.0) is supported on most Android devices from 2013 onward. ShaderEditor detects the #version 300 es directive and automatically creates a GLES 3.0 rendering context.
Key syntax differences from GLES 2.0:
#version 300 esmust be the very first line — no comments or blank lines before it.gl_FragColoris removed — you declare your own output:out vec4 fragColor;texture2D()becomestexture().- You gain integer textures, bitwise operators, flat interpolation, and
layoutqualifiers.
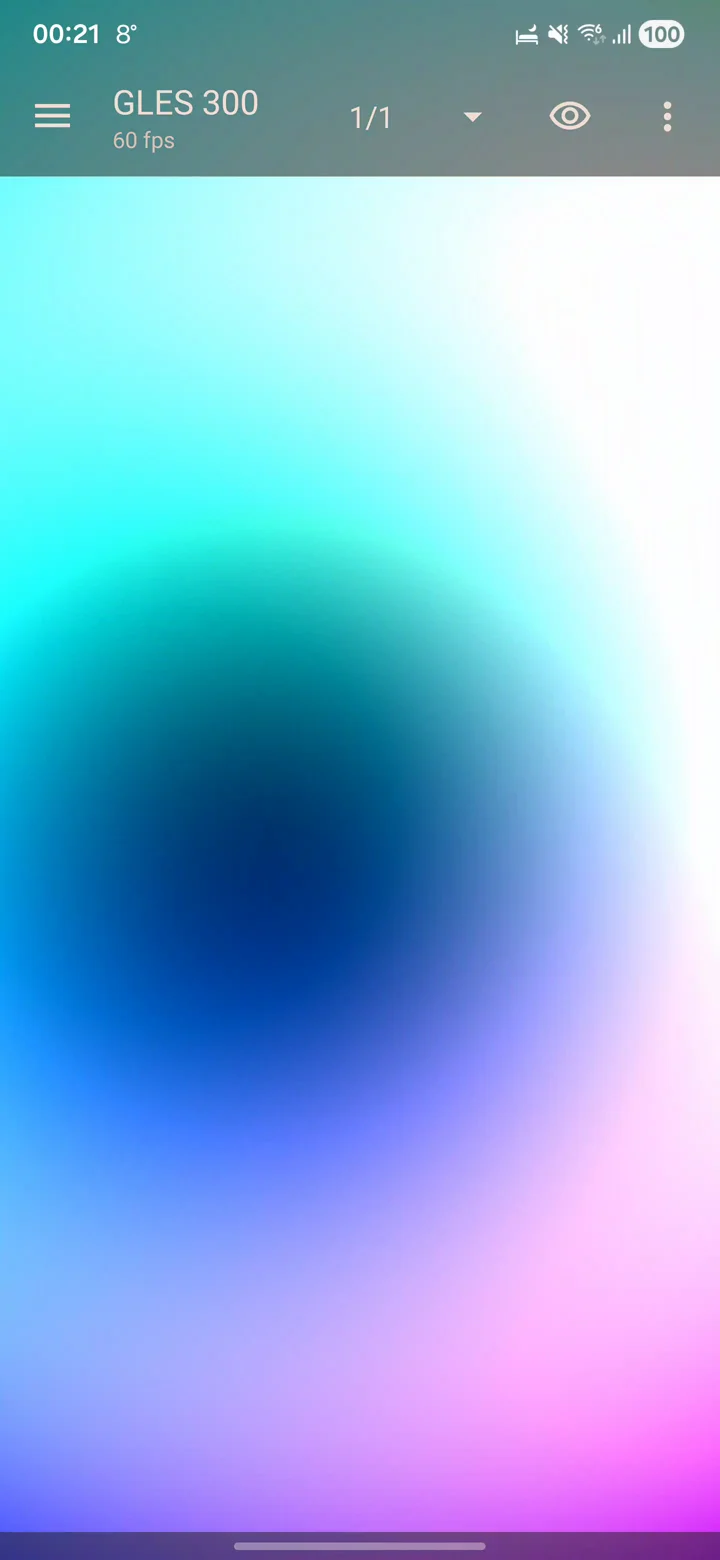
This example is intentionally the same Touch Ripples shader, rewritten for GLES 3.0, so you can compare the two side by side. The logic is identical — only the boilerplate changes.
Try this: Once in GLES 3.0, try integer operations: int px = int(gl_FragCoord.x); if ((px & 1) == 0) fragColor = vec4(0); creates a scanline effect impossible in GLES 2.0.
#version 300 es
#ifdef GL_FRAGMENT_PRECISION_HIGH
precision highp float;
#else
precision mediump float;
#endif

out vec4 fragColor;

uniform float time;
uniform int pointerCount;
uniform vec3 pointers[10];
uniform vec2 resolution;

void main() {
	float mx = max(resolution.x, resolution.y);
	vec2 uv = gl_FragCoord.xy / mx;
	vec3 color = vec3(uv, 0.25 + 0.5 * sin(time));

	for (int n = 0; n < pointerCount; ++n) {
		vec3 hole = vec3(sin(1.5 - distance(
			uv, pointers[n].xy / mx) * 8.0));
		color = mix(color, hole, -0.5);
	}
	fragColor = vec4(color, 1.0);
}Common questions
How do I use GLES 3.0 (or 3.1 / 3.2)?
Declare requested GLES version in very first line of shader:
#version 300 esYou can also use 310 es or 320 es if your device supports it.
In GLES 3.x, fragment output changes from gl_FragColor to your own out vec4 variable.
ShaderEditor detects version directive and creates matching GLES context automatically.
Do not put comments or blank lines before #version ....
How many FPS do I need for a live wallpaper?
Some devices limit GPU usage to consume less power when not plugged in. Always check performance with soft keyboard hidden and power cord off.
As rough rule, shader should make at least around 30 FPS to avoid slowing down UI.
If it does not, lower render quality with quality spinner (1/2, 1/4, etc.).
How much battery does a live wallpaper use?
Live wallpaper should only consume battery when you actually see it. So real impact depends on how often and how long you look at it. With normal use, you usually should not notice much difference.
When Save battery is enabled, rendering pauses on low battery to reduce power use further.
What if errors are not highlighted?
Unfortunately error information is disabled on some devices and GPU drivers. Error highlighting and reporting are not possible on those devices.
Shader can still compile and run normally even when driver does not report useful error logs.
Set wallpaper does not work
You need to set ShaderEditor as live wallpaper first. Go to system Settings → Display → Wallpaper → Live Wallpapers and choose Shader Editor.
As soon as Shader Wallpaper is active live wallpaper, you can change what shader is running from app menu with Set as wallpaper and Update wallpaper.
Why can’t both cameras be opened at same time?
This is system limitation. Android only allows one camera to be opened at a time. No app can use both front and back camera simultaneously.
time uniform loses accuracy / framerate drops over time
Most probably time is medium precision float in fragment shader.
That is default on many devices and it eventually loses precision.
Try high precision if hardware supports it:
#ifdef GL_FRAGMENT_PRECISION_HIGH
precision highp float;
#else
precision mediump float;
#endif
Or use second, subsecond, or ftime uniforms instead.
See issue #10 for details.
How can wallpaper animations continue after a pause?
Use uniform highp float runtime; instead of time for animation time.
runtime counts seconds between rendered frames and excludes pauses.
The first frame after a pause uses the same value as the last frame before it.
Unlike time, it survives surface and OpenGL context recreation.
The active wallpaper saves its runtime per shader when hidden, changed, or stopped, and restores it when loaded again. Editor and wallpaper previews have separate, temporary runtimes which reset when a shader is loaded. An abrupt process termination can lose time since the last save.
This preserves animation time, not backbuffer contents, random values, or
sensor input. As with time, floating-point precision decreases over time;
use high precision where supported.
How does backbuffer work?
Declare backbuffer like this:
uniform sampler2D backbuffer;Then sample previous frame with something like:
vec4 prev = texture2D(backbuffer, uv);This enables stateful effects like trails, blur, feedback, and cellular automata.
If you add ///p:noise after declaration, backbuffer starts with noise texture instead of black:
uniform sampler2D backbuffer;///p:noiseCan I paste ShaderToy code directly?
Yes.
If pasted code contains mainImage(), ShaderEditor automatically converts common ShaderToy names:
iResolution→resolutioniGlobalTime→timeiMouse→mouseiDate→date
A wrapper main() is generated automatically.
How do I import or export shaders?
Use Settings → Import/Export Database to back up and restore entire shader collection, including textures.
On older Android versions (below 10), you can also export individual .glsl files to Downloads/ShaderEditor.
Can I use custom textures?
Yes. Open Menu → Add Uniform → 2D Textures or Cube Maps tab. Pick image, crop if needed, set sampler parameters like wrap and filter, and ShaderEditor inserts uniform declaration into code.
What is #define SHADER_EDITOR?
ShaderEditor injects this line automatically into every shader:
#define SHADER_EDITOR 1Use #ifdef SHADER_EDITOR when you want code that only runs inside ShaderEditor.
Useful for portable shaders shared with other GLSL environments.
What fonts are available?
Several popular coding fonts are built in, including JetBrains Mono, Fira Code, and Source Code Pro. Ligature support can be toggled independently.
Choose font in Settings → Editor → Font.
How do I change render resolution?
Use quality spinner in toolbar.
Values range from 1/32 up to 2×.
Lower values render at fraction of screen resolution and can greatly improve performance or battery life. Each shader remembers its own quality setting.
Where can I learn more about shaders?
Get ShaderEditor
Free and open source. Available on F-Droid and Google Play.


Support the developer: